

Custom Embroidery Jackets: A Buyer's Guide for BC Businesses
You've ordered jackets for the crew, approved the digital mockup, and expected a straightforward delivery. Then the garments arrive: the left-chest logo is puckered, the large back design has pulled against a seam, and the high-visibility jacket no longer meets the requirements for the jobsite. The artwork looked right on screen, but the jacket was never treated as an engineered product.
That mistake is common in Vancouver because custom embroidery jackets sit at the intersection of garment construction, decoration, weather exposure, and workplace requirements. British Columbia has 107 embroidery services, including 17 in Vancouver, out of 1,082 across Canada, according to a 2026 Canadian business database, so local buyers have meaningful access to jacket decoration capacity and regional sourcing across the Canadian embroidery market. The choice of supplier still matters, but the buyer's technical decisions matter first.
Table of Contents
- Why Custom Embroidery Jackets Demand More Planning Than You Think
- Choosing the Right Fabric for Embroidered Jackets
- Stitch Types, Density, and Placement Rules That Prevent Puckering
- When Embroidery Is the Wrong Method for Your Jacket
- Care Instructions and Durability Expectations for Embroidered Workwear
- Pricing, Lead Times, and Digitizing Costs for Custom Embroidered Jackets
Why Custom Embroidery Jackets Demand More Planning Than You Think
A T-shirt gives an embroidery machine a relatively simple surface. A jacket may contain a shell, lining, insulation, waterproof coating, elastic panels, seams, zippers, and reflective tape. The needle has to pass through those layers without forcing the fabric apart or creating a rigid patch of thread that no longer moves with the garment.
That's why a Vancouver contractor can receive two apparently similar jackets and get different results from the same logo. One shell may be stable enough for a crisp chest mark. Another may stretch under the hoop, resist needle penetration, or expose the stabilizer at the inside of the garment. The logo file isn't necessarily the problem. The garment and the decoration method may just be a poor match.
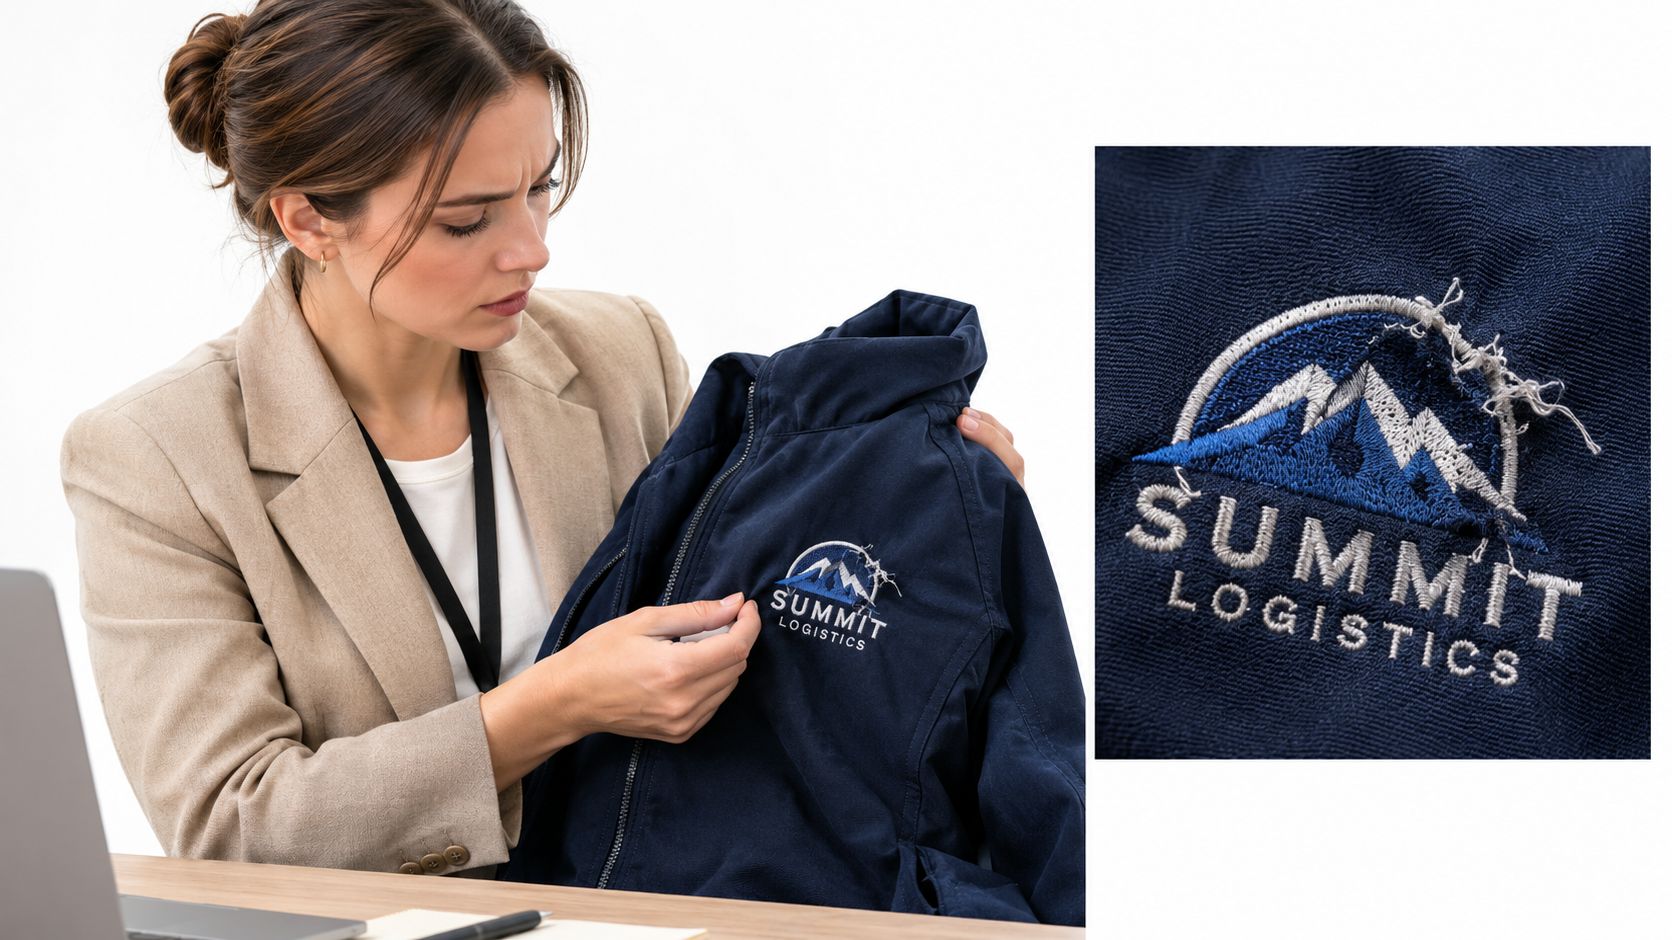
The jacket changes the production equation
Outerwear needs a digitized design that accounts for underlay, stitch angle, pull compensation, and density. Those settings control how the thread sits on the material and how much the fabric moves during stitching. A file that performs well on a polo can create excessive tension on an insulated work jacket.
The placement matters just as much. Flat, supported zones such as the left chest or upper back yoke usually offer better control than a curved shoulder, a pocket edge, a hem, or an area crossing a seam. Large back fills can also turn a flexible jacket into a heavy, stiff panel.
Practical rule: Approve the jacket and the decoration plan together. Don't approve a logo in isolation from the garment it will cover.
The order brief should identify the jacket's shell, lining, insulation, stretch, water resistance, intended work environment, and decoration locations. Ask for a mockup that shows the actual placement, not just a logo floating over a generic silhouette. A professional proof should also prompt a conversation about whether the artwork needs simplification before production.
The Canadian custom apparel market was valued at USD 70.25 million in 2024 and is projected to reach USD 122.16 million by 2032, with a reported 7.16% compound annual growth rate, although the market includes decorated apparel broadly rather than embroidered jackets alone in the Canadian embroidery market outlook. For procurement teams, the useful point isn't to assume every jacket should be embroidered. It's to recognise that more suppliers and more garment options make technical specification even more important.
Choosing the Right Fabric for Embroidered Jackets
The blank jacket is the foundation of the job. If the fabric can't support the needlework, improved digitizing won't fully rescue the result.
Stable, tightly woven workwear fabrics generally provide the most predictable embroidery surface. Heavy poly-cotton shells, structured bomber fabrics, and firm softshells can hold a clean left-chest logo because they resist movement while the needle builds the design. Their structure also helps the garment recover after stitching instead of allowing the decorated area to collapse into ripples.
Fleece requires a different approach. Its surface can swallow small details, while the pile may show through lettering or thin borders. A suitable topping or carefully planned underlay can help keep the design visible, but dense fills may make the area feel bulky. Fleece-lined jackets also require attention to the inside of the garment, since the stabilizer and thread should not create an uncomfortable rough spot against the wearer.
Match the shell to the logo
Use the garment's construction to guide the decoration:
- Structured work jackets: These are usually suitable for bold chest marks and selected sleeve placements. Their stable surfaces can support more substantial stitching, provided the design avoids seams and hardware.
- Softshell jackets: These can produce a polished result, but stretch and layered construction require controlled density and careful hooping. A compact chest logo is generally a safer choice than a broad fill.
- Fleece-lined outerwear: Choose bold shapes and readable lettering. Fine details can disappear into the nap, and heavy thread buildup can reduce comfort.
- Lightweight windbreakers: These need restraint. Excess needle penetration can distort the shell, create visible puckering, or compromise the clean drape that makes the garment useful.
- Waterproof hardshells: Treat these as a warning sign. Needle holes may affect the shell's weather performance, so embroidery should be tested or replaced with a non-penetrating method.
A useful starting point is to compare the garment's intended role with the location of the logo. A left-chest mark on a stable work jacket is a lower-risk project than a large back design on a thin, coated shell. Browse jacket styles suitable for decoration, then ask the decorator which construction has already been tested with your logo type.
Check the inside, not just the outside
Procurement teams often inspect the front of a sample and overlook the reverse. Ask whether the backing will irritate the wearer, catch on an underlayer, interfere with a pocket, or sit over an insulation seam. A jacket that looks sharp on a hanger can become unpopular if the embroidery creates a stiff or scratchy area during a full workday.
The safest specification combines a suitable shell with a restrained logo, supported placement, and a proof that shows how the design will behave on the actual garment.
Stitch Types, Density, and Placement Rules That Prevent Puckering
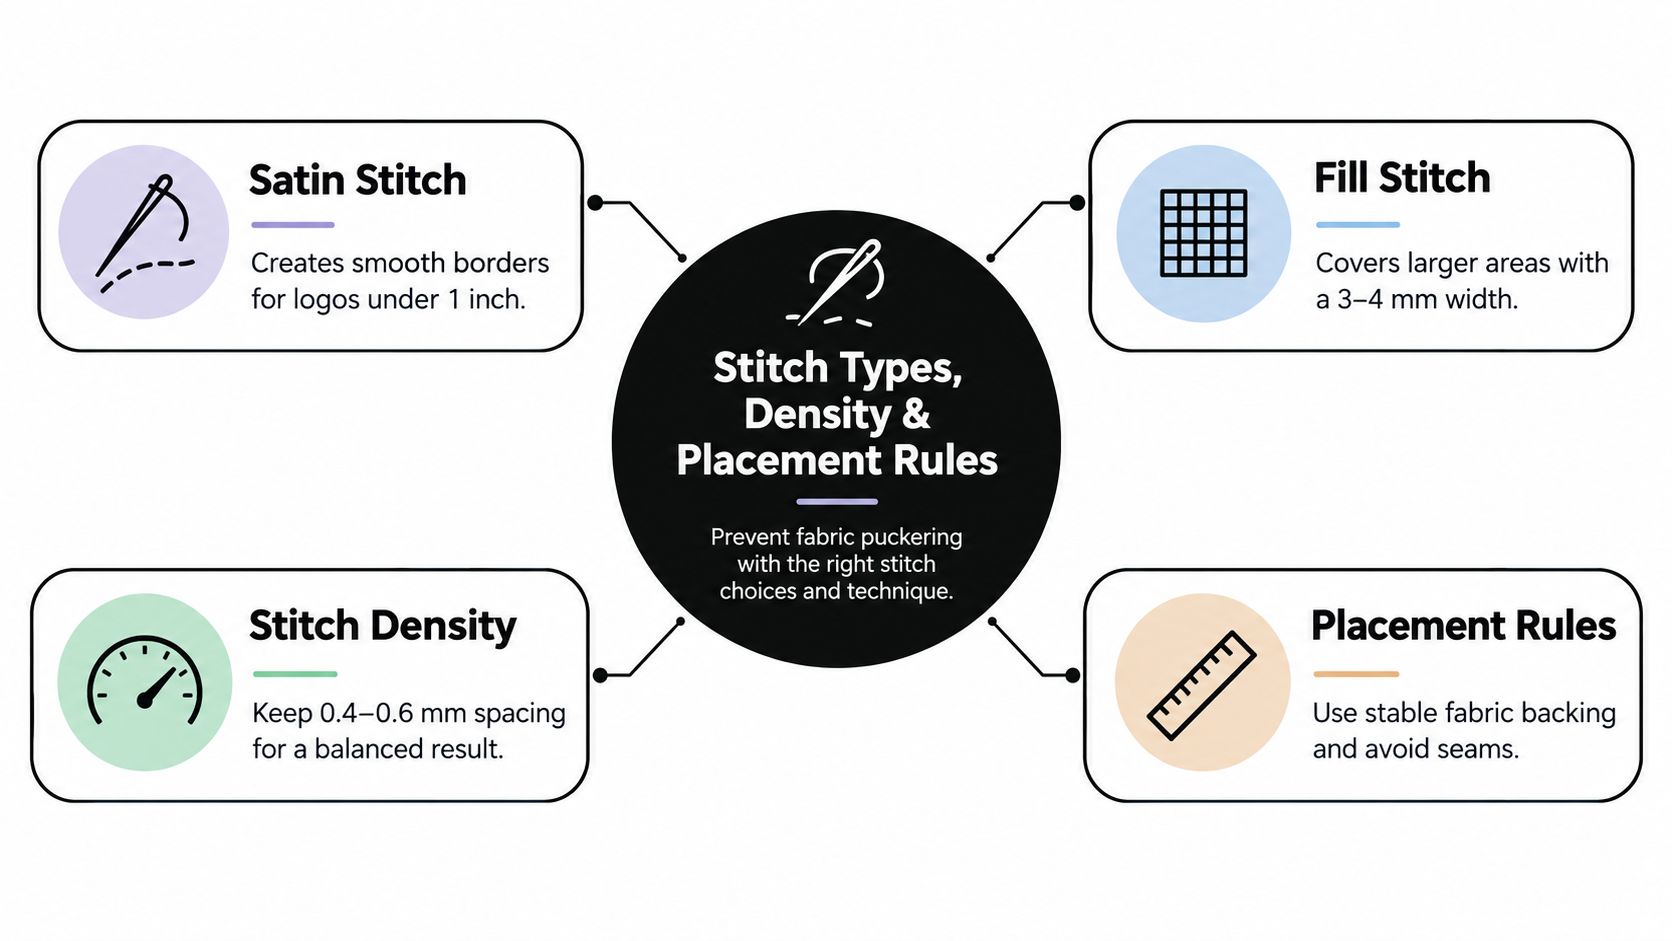
Embroidery quality starts before the machine runs. A digitizer converts artwork into a stitch file, and that file determines how the needle approaches the fabric. It specifies stitch type, angle, density, underlay, and pull compensation. Those settings control both appearance and mechanical stress.
Satin stitches work well for clean borders, narrow columns, and bold lettering. Fill stitches cover broader shapes, but they place more thread into the garment and can create torque when used too aggressively. Running stitches can define fine lines, although very small details may lose clarity on textured or layered outerwear.
The key issue is not just how many stitches a logo contains. It's how those stitches are distributed across the jacket.
Keep the design within the garment's tolerance
For work jackets, one Canadian embroidery guide recommends keeping each placement around 10,000 to 15,000 stitches to reduce puckering, preserve seam mobility, and limit heavy needle penetration through outer shells or insulation layers in its guidance for jacket embroidery. That isn't a universal production limit. A decorator may adjust the result for the specific fabric, logo, and stabilizer, but it's a useful boundary for procurement discussions.
Ask the digitizer:
- What is the stitch count: Is the design being simplified, or is the file building unnecessary thread into broad areas?
- Where is the underlay: Does the foundation support the top stitching without pulling the shell out of shape?
- How is pull compensation handled: Will lettering and borders remain aligned after the fabric relaxes?
- Which areas are excluded: Does the file avoid seams, zippers, pockets, reflective tape, and highly curved panels?
- What has been tested: Has the design been sewn on the selected jacket, or only previewed digitally?
A clean proof is not proof of a clean sew-out. Ask to see how the file is engineered for the fabric, not just how the logo looks on screen.
Placement should favour flatter, stable zones. The left chest is popular because it offers a manageable area with strong visibility and relatively little movement. The upper back yoke can work for a larger mark when the garment provides enough support. Avoid oversized fills on stretchy panels, padded areas, or locations where the wearer bends constantly.
For more background on how embroidery stitch types affect finished decoration, focus on the relationship between visual detail and physical thread buildup. A simpler logo often looks more premium than a crowded one because its edges remain distinct and the jacket keeps its original flexibility.
Review the final proof for practical movement, not just brand accuracy. If a seam runs directly through a letter, if the design sits over a pocket opening, or if the logo occupies a thin shell's most flexible panel, send it back before production.
When Embroidery Is the Wrong Method for Your Jacket
Embroidery earns its place on structured outerwear because thread creates texture and a durable, professional finish. It isn't automatically the best option for every jacket, though. Technical shells, fine artwork, and lightweight constructions can make stitching a liability rather than an upgrade.
A patch is often more suitable when the artwork contains many small elements, when the jacket's shell should not be pierced repeatedly, or when the organisation may reuse the same emblem across different garments. The patch can be embroidered separately and attached using an appropriate method, giving the decorator more control over the base material. It also creates a distinct badge appearance, which may suit clubs, crews, and outdoor brands.
Direct-to-film transfers can handle detailed, multicolour artwork without converting every visual element into a dense field of stitches. They're worth considering for thin shells, complex illustrations, gradients, and logos that need a smooth surface rather than raised texture. Screen printing can also make sense for larger, simple graphics on compatible jackets, particularly when a flat graphic is more important than a premium stitched finish.
Use the decoration method as a decision, not a default
| Jacket or artwork condition | Embroidery | Patch | DTF or print |
|---|---|---|---|
| Stable work jacket with a bold chest logo | Strong fit | Possible alternative | Usually unnecessary |
| Thin shell or lightweight windbreaker | Higher risk | Often worth testing | Often more suitable |
| Waterproof or coated technical shell | Requires caution | Can reduce needle penetration | May protect the shell better |
| Complex multicolour artwork | Can become thread-heavy | Useful for badge treatment | Often clearer |
| Large back artwork | May become bulky | Suitable for a separate emblem | Can preserve a lighter hand |
| Small premium logo | Usually effective | Changes the visual style | Works if a flat finish is preferred |
The right choice depends on three questions. What does the garment need to do? A waterproof shell has a different priority from a uniform bomber. What does the artwork contain? A bold wordmark behaves differently from a detailed crest. What should the finished mark feel like? Embroidery is tactile and refined, while a transfer is flatter and can preserve fine visual detail.
Most Canadian jacket guides discuss placement, turnaround, and pricing, but buyers also need to know when embroidery should be rejected. Canadian custom embroidery guidance identifies clean, bold logos and premium placements as strong use cases while noting that complex artwork becomes more expensive as stitch count rises. That distinction can prevent a costly rework cycle.
For high-performance rainwear, test the decoration on a spare garment before approving a full run. If the shell's weather protection is central to the purchase, a patch or transfer may protect the garment's function better than a dense stitched design.
Care Instructions and Durability Expectations for Embroidered Workwear
A stitched logo can handle demanding use, but the jacket still needs appropriate care. Thread may resist fading and cracking better than a surface graphic, yet heat, abrasion, harsh detergents, and rough drying can affect both the decoration and the shell.
Start with the garment's care label. If the jacket manufacturer specifies cold or cool washing, follow that instruction rather than applying a generic uniform routine. Turn the jacket inside out before washing when the construction allows it, close zippers and fasteners, and use a mild detergent without bleach unless the garment label specifically permits it.
Protect the thread and the shell
- Wash gently: Use the care label's recommended cycle and temperature. Aggressive agitation can rub the embroidered face against other garments.
- Avoid unnecessary chemicals: Bleach and strong solvents can affect thread colour, coatings, trims, and synthetic shell materials.
- Skip high heat: Air drying or low-temperature drying is safer for the thread and the jacket's shape than intense heat.
- Don't iron directly over the logo: If pressing is necessary, protect the embroidery from direct heat and pressure.
- Inspect after washing: Look for loose threads, lifted edges, distortion, or puckering before the garment returns to active use.
Construction and industrial crews should also inspect the decoration after exposure to grime, rain, abrasion, and equipment contact. A loose thread shouldn't be pulled. Trim it carefully or send the garment for repair, because tugging can open the design further.
Care affects perceived durability as much as thread choice. A jacket that's washed harshly and dried hot will show wear sooner, even when the original embroidery was properly produced.
Office uniforms and occasional event jackets usually face less abrasion than garments worn around tools, vehicles, scaffolding, or rough materials. Plan replacement based on the jacket's whole condition, not only the logo. A faded shell, damaged zipper, compromised waterproof finish, or worn cuff can make the garment unsuitable before the stitching fails.
For high-visibility workwear, inspect the reflective tape and fluorescent background at the same time as the logo. Decoration must remain clear of the tape and must not displace so much fluorescent material that the jacket no longer meets its required class conditions.
Pricing, Lead Times, and Digitizing Costs for Custom Embroidered Jackets
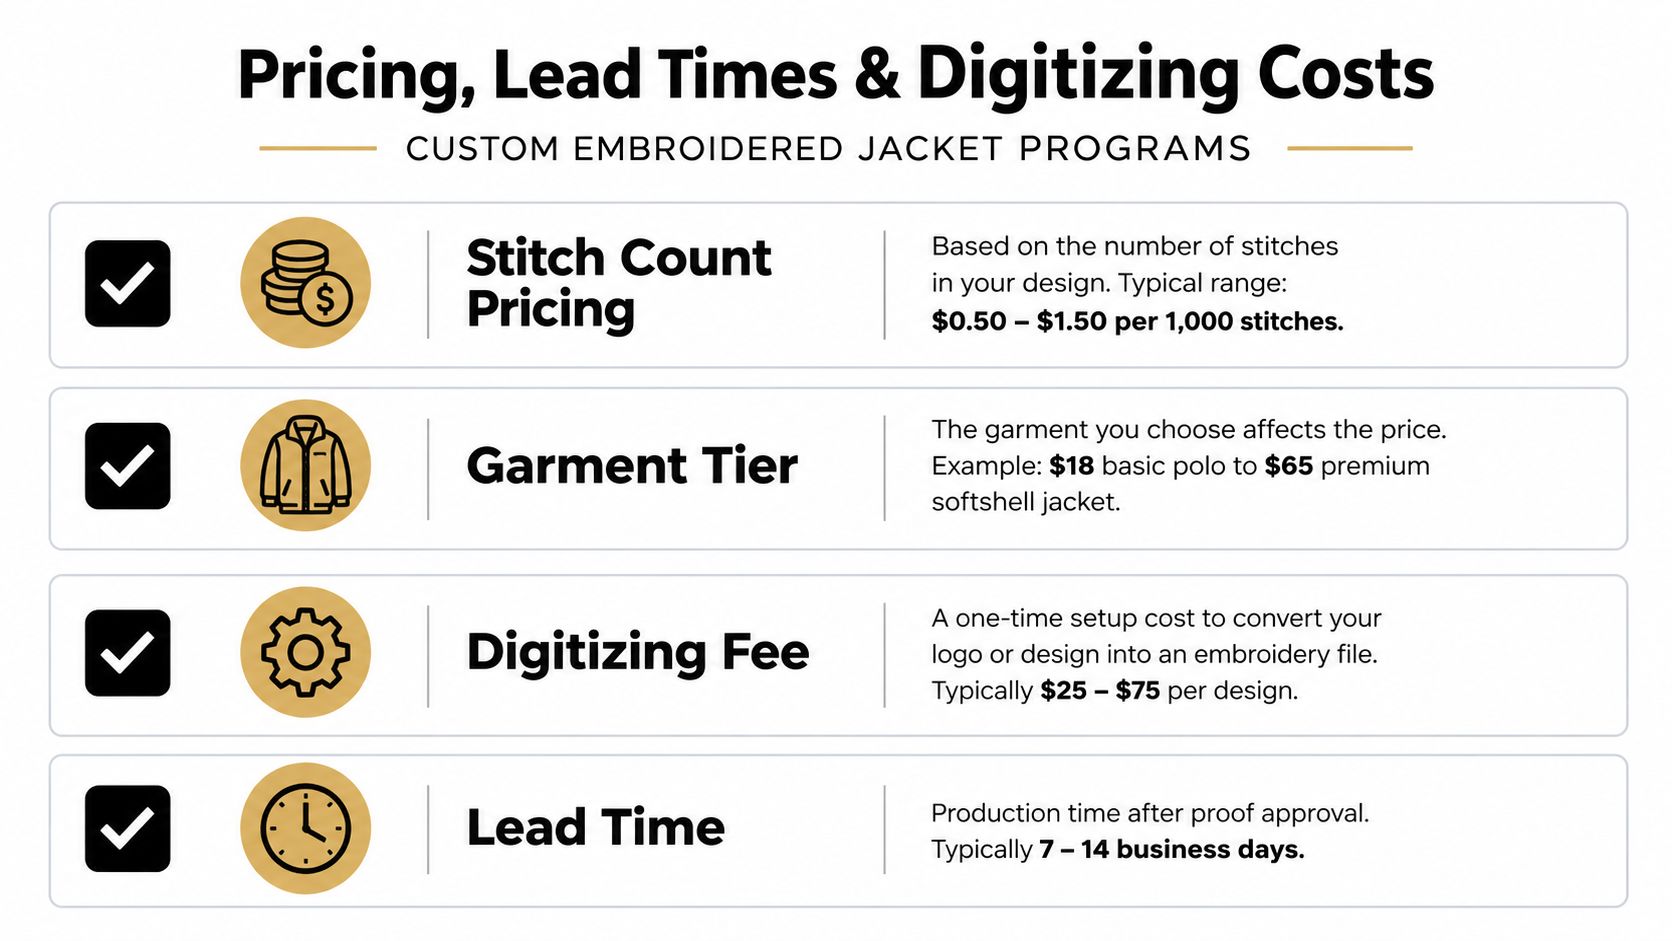
A jacket quote combines several decisions that buyers sometimes treat separately. Stitch count, garment choice, quantity, decoration locations, artwork complexity, and digitizing all influence the final project. A one-time digitizing fee may apply before production because the logo needs to be converted into a machine-readable stitch file.
Canadian sourcing guidance commonly places production windows around 5 to 14 business days, with rush options available, but the practical clock may start only after the proof is approved in this overview of Canadian embroidery ordering. If the logo needs revisions, the jacket is difficult to hoop, or the supplier must source a particular garment, approval and production can take longer.
Budget the setup, not only the jacket
For a small run, digitizing and proof approval can represent a larger share of the project's effort because the setup still has to happen even when the garment count is modest. For a larger uniform programme, the setup can be spread across more pieces, but additional locations and complicated artwork still add production work.
Before requesting a quote, prepare:
- The finished artwork: A clean vector logo gives the digitizer a stronger starting point.
- The garment specification: Include shell type, colour, lining, insulation, sizes, and intended use.
- The decoration map: State the exact locations and whether each location uses the same file.
- The approval deadline: Allow time to review the proof and resolve questions before production begins.
- The delivery requirement: Separate the date the jackets are needed from the date you hope to place the order.
Ask whether the quoted price includes digitizing, a sew-out or proof, jacket handling, multiple placements, and any rush service. Professional embroidery service information can help buyers frame those questions before they commit to a jacket programme.
A sensible procurement process is to test one garment or a small initial batch when the shell is technical, the artwork is dense, or the jackets will be used for safety-critical work. The cheapest quote can become the expensive option if it produces distorted garments, forces a decoration change, or delays a crew outfitting.
Power Print provides embroidery, apparel decoration, garment selection support, and pre-production mockup approval for Vancouver businesses ordering branded jackets and workwear. Send your logo, jacket requirements, placement preferences, and deadline to Power Print for a practical review of which decoration method fits the garment.