

Embroidery Vancouver BC: A Practical Local Guide
A Vancouver coffee roaster can go from two cafés to a wholesale programme quickly. Suddenly, the team needs branded polos, aprons, caps, and high-visibility jackets, all approved and delivered before a product launch. The logo looked perfect on screen, but the real questions arrive when the garments are in front of you: will the stitching hold through commercial laundering, can the logo sit on a safety jacket without affecting visibility, and who can deliver locally without turning a simple order into a shipping problem?
That buying moment usually starts with growth, a new contract, a rebrand, or a staff-uniform refresh. Searching for embroidery Vancouver BC is easy. Choosing the right garment, decoration method, production partner, and compliance process takes more care. This guide gives small-business owners and procurement leads a practical way to make those decisions.
Table of Contents
- Why Embroidery in Vancouver BC Is Worth Understanding
- How Custom Embroidery Actually Works
- What Quality Embroidery Looks Like Up Close
- Turnaround Times and Pricing Ranges You Can Plan Around
- Choosing the Right Vancouver Embroidery Shop
- Compliance, Safety Wear, and Sustainability Considerations
- Planning Your Next Embroidery Order With Confidence
Why Embroidery in Vancouver BC Is Worth Understanding
Local embroidery isn't only about convenience. Metro Vancouver businesses often need branding on garments that have to perform in rain, warehouses, kitchens, construction sites, hospitality environments, and customer-facing settings. A shop that understands local workwear can help you choose a suitable garment and decoration approach before production begins.
The region's industrial history also gives useful context. In 1949, Statistics Canada recorded 129 establishments in the Canadian embroidery-related industry, including two in British Columbia, while Quebec and Ontario accounted for most of the national activity. The same report recorded $6,910,115 in production value, with $3,135,004 attributed to embroidery and related classified activities generating the majority of the value. Montreal represented 71% of gross production value and 75% of employment, showing how strongly production was concentrated in eastern Canada at the time. See the 1949 Statistics Canada embroidery industry report for the original tables and classifications.
British Columbia's role expanded later. A Statistics Canada report listed the province with 146 establishments and 1,533 employees in 1960, compared with 92 establishments and 1,091 employees in 1959, although the classification included embroidery alongside activities such as pleating and hemstitching. The 1960 Statistics Canada industry report makes the limitation clear. These aren't embroidery-only figures, but they do show the growth of a broader local textile-decoration ecosystem.
Start with the buying decision
Before requesting a quote, answer five questions:
- What garment is required? A polo, apron, jacket, cap, vest, or stretch performance shirt needs a different stabilisation and placement approach.
- Where will the logo go? Left chest, sleeve, back, cap front, and apron pocket each create different production constraints.
- What will the garment endure? Retail wear, kitchen laundering, outdoor work, and industrial use call for different thread and backing choices.
- Does safety compliance apply? High-visibility workwear needs a separate review before decoration.
- When must the order be ready? Local pickup helps, but it doesn't replace early approval of artwork and samples.
You should also expect questions about digitising, thread colour, backing, minimum quantities, garment availability, and whether a CSA-rated garment is involved. A good Vancouver embroidery shop won't treat those details as admin. They'll treat them as part of the finished product.
How Custom Embroidery Actually Works
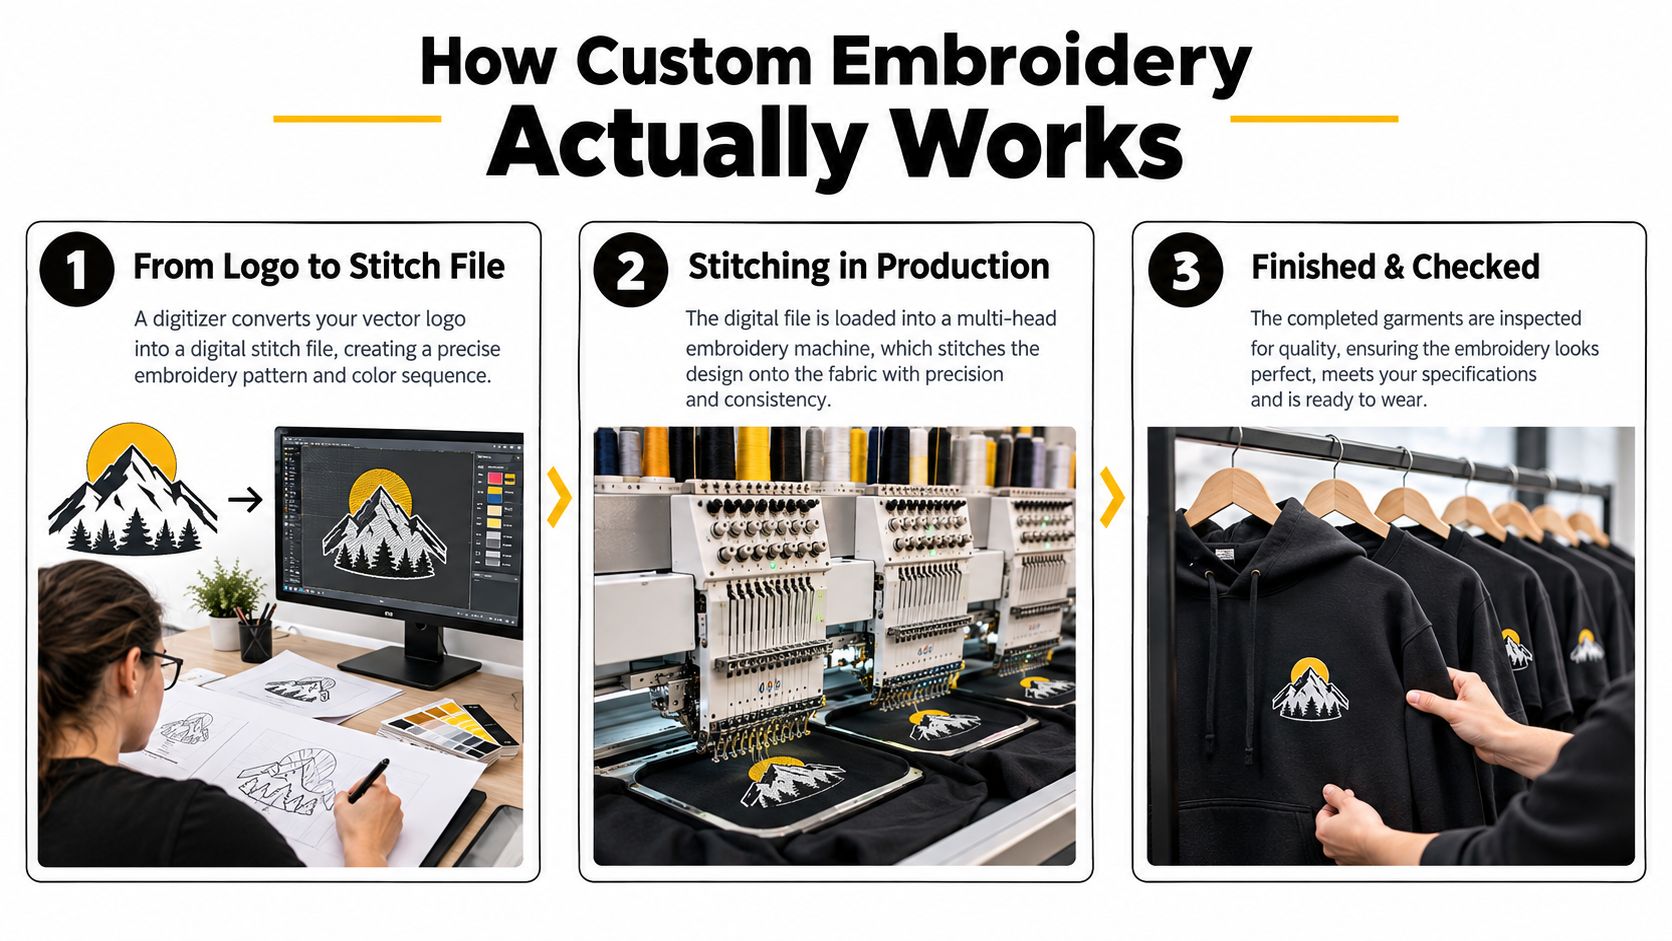
Custom embroidery starts before a needle touches fabric. A logo file, even a clean vector, must be converted into a machine-readable stitch file. Think of the digitiser as a pattern maker. They decide how the design will be constructed, where each section begins and ends, how stitches overlap, and how the fabric needs to be supported.
That decision affects the result more than the number of thread colours. Satin stitching can create a clean edge on narrow lettering and borders. Fill stitching covers larger shapes. Running stitches handle fine lines and small details. If a digitiser uses a dense fill where a lighter construction would work better, the garment can pucker or become stiff. If small lettering is built with unsuitable stitch settings, it may look blurred, crowded, or chewed up.
The material choices matter
Machine embroidery thread is designed to be visible, smooth, and consistent as it runs through the needle. Polyester is the practical workhorse for uniforms and outerwear because it generally handles moisture and repeated laundering well. Rayon offers a softer sheen for fashion-oriented branding, while metallic thread can work as an accent when the design and garment justify the extra handling.
Don't choose thread in isolation. The digitiser must account for the fabric's stretch, thickness, weave, and surface. A dense logo that works on a structured twill jacket may distort on a lightweight performance polo. A cap requires a different approach again because the curved front changes how the machine accesses the design.
Backing stabilises the fabric during stitching. Cutaway backing is commonly suited to stretch garments because it remains attached and supports the design after production. Tearaway backing can be appropriate for more stable materials where the excess can be removed cleanly. A water-soluble topping can help prevent the needle and thread from sinking into a looped polo surface, which keeps the design more legible.
Practical rule: Send the cleanest vector artwork you have, ask who will digitise it, and approve a sample on the actual garment before releasing a full run.
For a useful overview of decoration styles, review this guide to different types of embroidery. Expect a setup or digitising charge for a new design, especially when the logo needs careful reconstruction rather than a simple file conversion.
What Quality Embroidery Looks Like Up Close
A polished mockup doesn't prove that the finished garment is good. Inspect the first sample physically. You can identify most serious problems quickly if you know where to look.
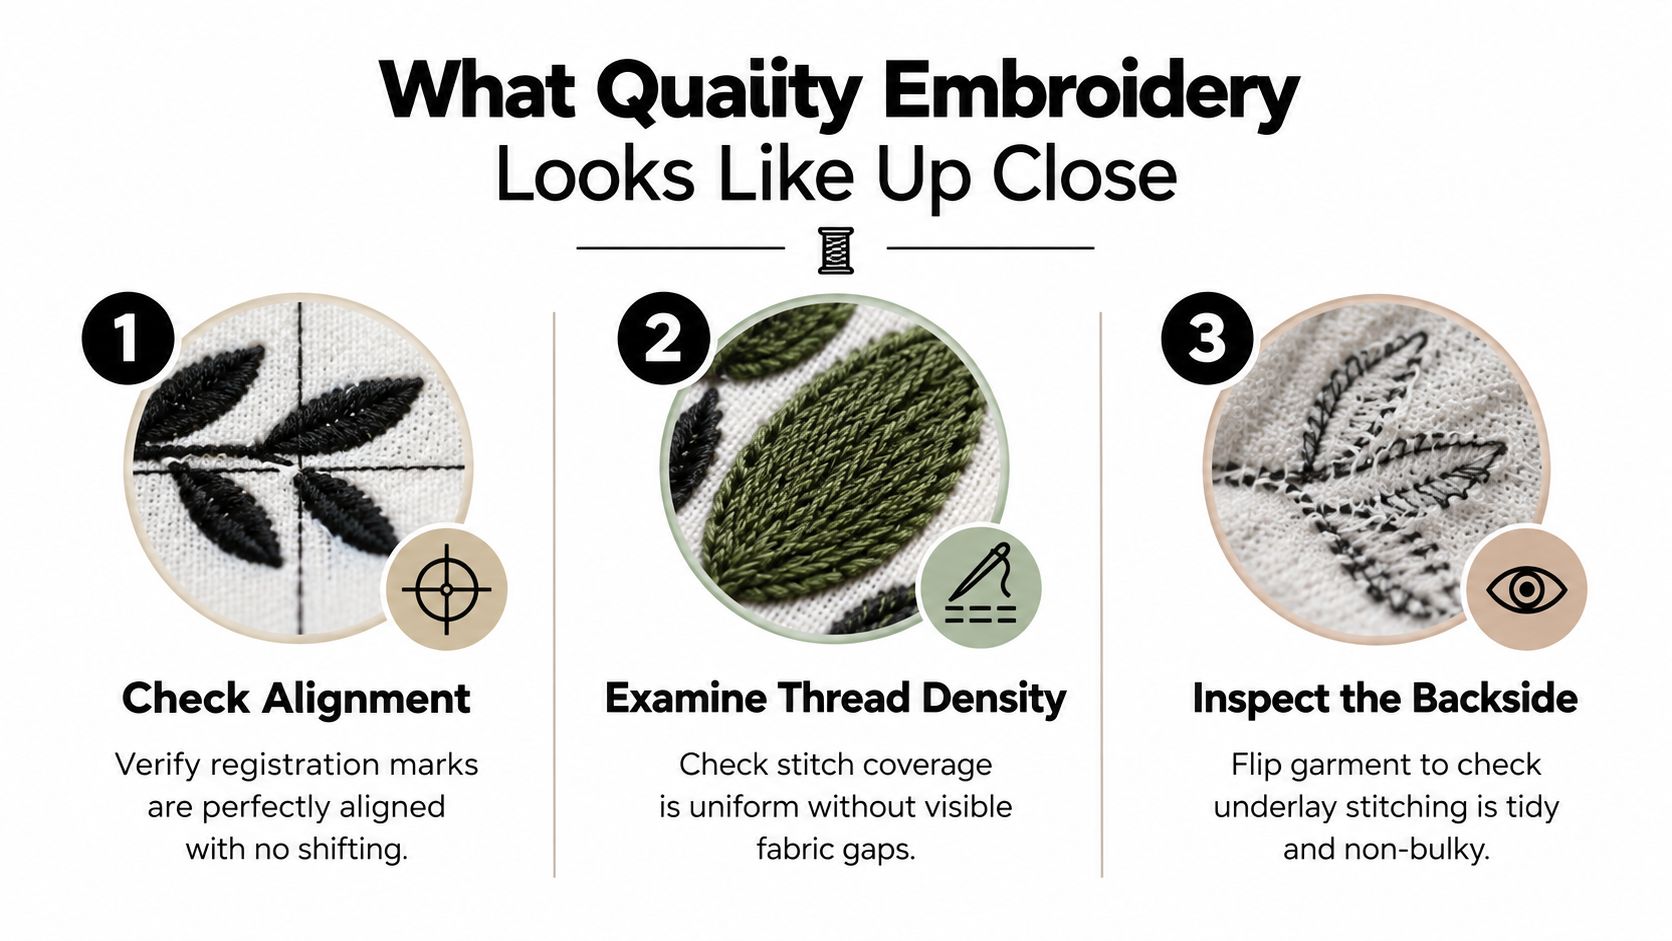
Start with registration. Each colour should meet the next cleanly, with no visible gaps, white slivers, or shifting outside the outline. Small movement can make lettering look uneven, especially when a design includes fine borders or several adjoining colour fields. Stand back from the garment, then inspect the logo close up under normal shop or office lighting.
Use your eyes and your hands
Density is the next test. A solid embroidered area should look intentionally covered, not like a thin mesh with fabric showing through. Some open texture may be part of the design, but random gaps usually point to poor stitch settings, unsuitable underlay, or an unstable garment.
Run your thumb over the face of the embroidery. Quality work should feel raised and defined, but relatively flat and controlled. Loops, oversized ridges, and loose thread indicate that the design or machine settings need attention. Turn the garment inside out and inspect the backing, bobbin area, and thread paths.
A tidy reverse doesn't need to look decorative. It should, however, avoid tangled nests, unnecessary thread trails across open areas, bulky backing, and loose jump stitches that can catch during wear or laundering. The garment itself deserves inspection too. Look for hoop marks, shine or scorching from excessive heat, distortion around the design, and inconsistent placement across matching pieces.
Approve the sample with a pass-fail check
Use this short inspection before authorising production:
- Alignment: Pass only if colour boundaries meet cleanly and lettering remains legible.
- Coverage: Pass only if filled areas look even at normal viewing distance.
- Tactile finish: Pass only if the face feels structured rather than loopy or excessively bulky.
- Backside construction: Pass only if the backing and bobbin work are secure and reasonably tidy.
- Garment condition: Pass only if there are no hoop marks, scorch marks, puckering, or needle damage.
- Batch consistency: Pass only after comparing more than one piece when the order includes multiple garments.
A shop should welcome this inspection. For jackets and outerwear, ask for a sample stitch-out on the actual fabric and review the custom embroidery jacket options before approving placement across the order.
Turnaround Times and Pricing Ranges You Can Plan Around
Embroidery quotes vary too much to justify a made-up universal price list. Stitch count, garment type, quantity, artwork condition, backing, thread changes, personalisation, and garment availability all affect the final figure. A quote for a simple left-chest logo on stocked polos isn't comparable with a dense back design on lined jackets.
The safest way to plan is to request a written quote with each cost separated. Ask the shop to identify the garment, decoration location, stitch or complexity band, digitising, backing, thread upgrades, names, packaging, delivery, and any rush handling. If one vendor gives a single total and another itemises the work, the second quote is easier to audit.
A planning table for Vancouver buyers
| Order Size | Typical Turnaround | Left-Chest Logo on Polo | Cap / Headwear | Safety Vest or Outerwear |
|---|---|---|---|---|
| Small run | Confirm after artwork and garment availability | Request a per-piece quote based on stitch count | Request a cap-specific quote | Confirm backing and placement on the actual garment |
| Mid-volume order | Confirm production slot in writing | Compare garment and decoration costs separately | Ask whether the cap structure changes setup | Request a sample before the full run |
| Larger corporate order | Build in approval and replenishment time | Negotiate consistent reorders, not only the first quote | Confirm size, colour, and stock continuity | Document garment class, logo location, and inspection process |
Build the quote from its real components
Digitising may be charged separately for a new logo. Some shops include it in a larger order, while others retain the file and charge for future edits or alternate placements. Thread colour changes can add handling, and individual names or job titles require a different production workflow from a repeated logo.
Garment sourcing can also move the quote. A premium blank, waterproof shell, structured cap, lined jacket, or technical work shirt may cost more than a basic polo, but the cheaper garment can create replacement and appearance problems later. Ask whether the proposed blank is stocked locally or needs to be brought in. A low decoration price doesn't help if the garment arrives late or the colour can't be replenished.
Spring uniform changes and autumn event preparation are predictable busy periods. Don't leave artwork approval until the week before wear date. If the order supports a contract, launch, or site opening, reserve a production slot early and keep a backup garment option ready.
Choosing the Right Vancouver Embroidery Shop
The lowest quote is rarely the lowest total cost. A shop that saves a small amount on each piece but produces uneven placement, weak digitising, or poor garment sourcing can leave you paying for rework, replacements, and staff time.
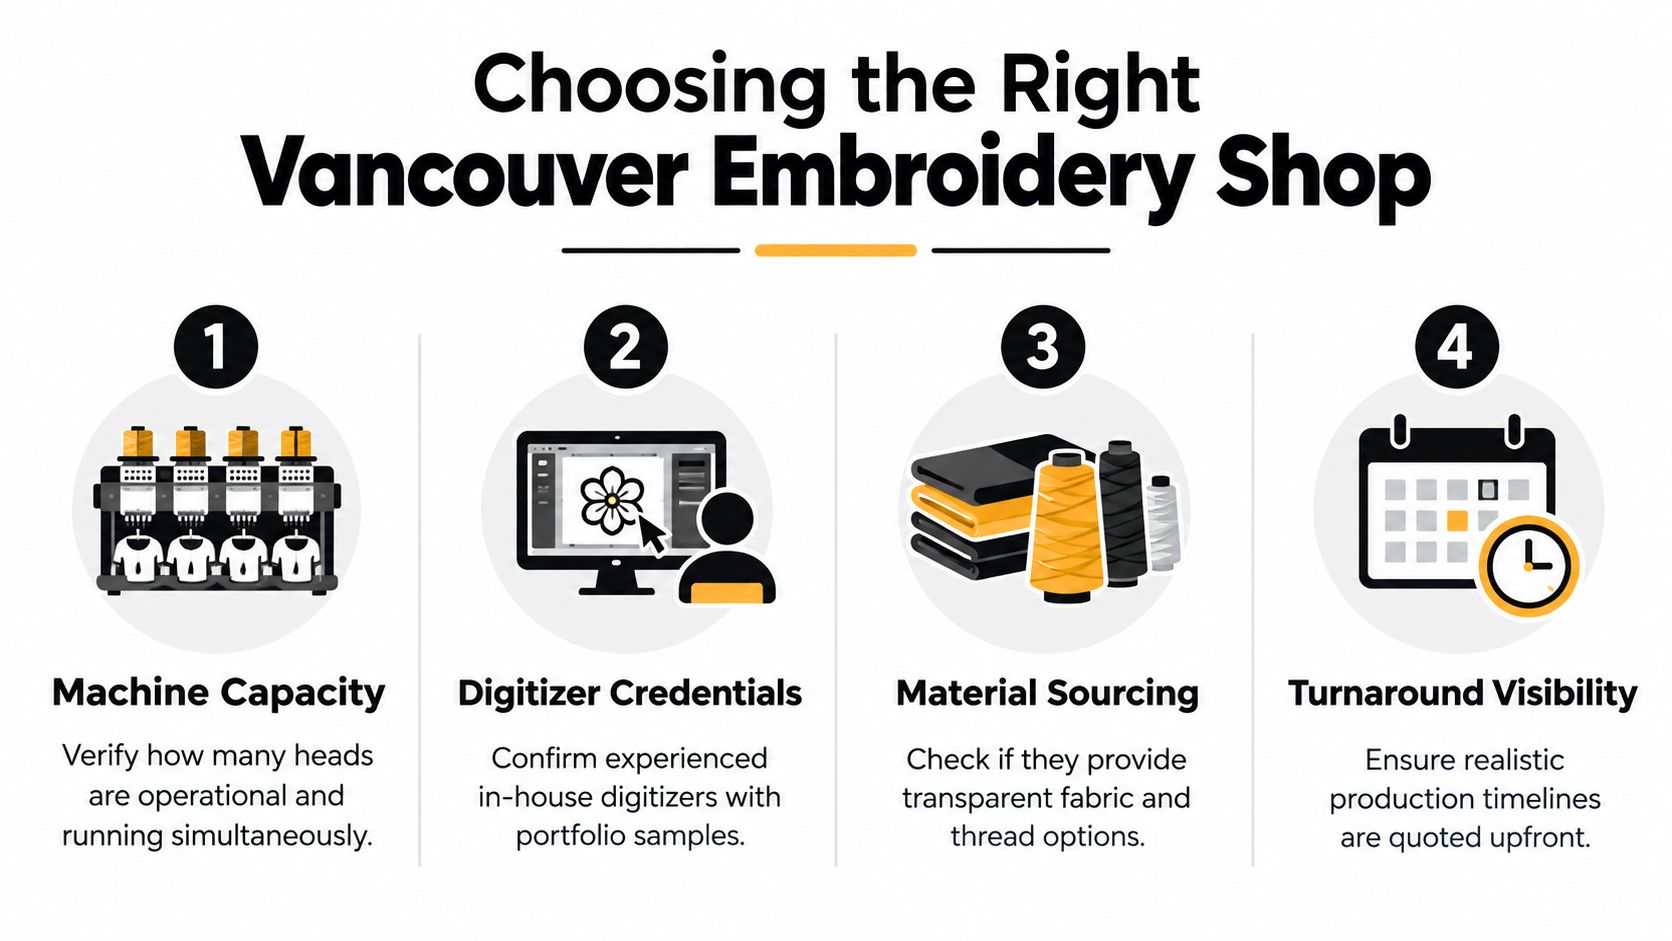
Start with production capability. Ask whether the shop uses industrial multi-needle equipment, how many heads are available for your run, and whether the work is handled in-house. A single-head machine can be perfectly suitable for samples or small custom work. It shouldn't be presented as equivalent to a production setup when your deadline depends on consistent batch output.
Ask for evidence, not marketing
Yelp ratings and polished social-media reels show surface-level presentation. They don't show how a shop handles a difficult stretch fabric, a dense logo, a curved cap, or a failed sample. Ask for a stitch-out on the actual garment, not only a digital mockup.
Find out who digitises the logo and whether the file can be kept on record for future orders. An experienced digitiser should be able to explain the stitch construction, underlay, density, and expected limitations. If the artwork was outsourced, that isn't automatically a problem, but the shop should still take responsibility for testing and correcting the result.
A local operation has a practical advantage when the order matters. You can inspect a sample, discuss a damaged piece, confirm colour in person, and arrange a replacement without relying entirely on shipping. That access can justify paying more per piece than an anonymous low-cost supplier.
A cheap logo is expensive if you can't get a clean replacement before your staff or crew needs it.
For businesses combining apparel with signs, merchandise, or other branded products, a provider with printing, embroidery, and engraving in one place may reduce handoffs. Judge that option by its production controls, not by the number of services listed on its website.
Run this checklist on the first call
- Timeline: Get the production and delivery date in writing.
- Digitising: Confirm who creates the file and whether future reorders use the approved version.
- Sample policy: Ask whether the shop provides a stitch-out on the actual garment.
- Defect handling: Find out how misaligned, damaged, or inconsistent pieces are reviewed and replaced.
- Materials: Ask about thread, backing, garment sourcing, and laundering expectations.
- Safety knowledge: For high-visibility orders, confirm that the team understands WorkSafeBC considerations and won't place branding over required reflective areas.
A shop that answers directly is easier to manage than one that promises everything without explaining the production limits.
Compliance, Safety Wear, and Sustainability Considerations
Durable embroidery isn't automatically the responsible choice. A garment can last a long time and still be unsuitable for a safety programme, obscure required labelling, or become difficult to reuse once a company changes its logo.
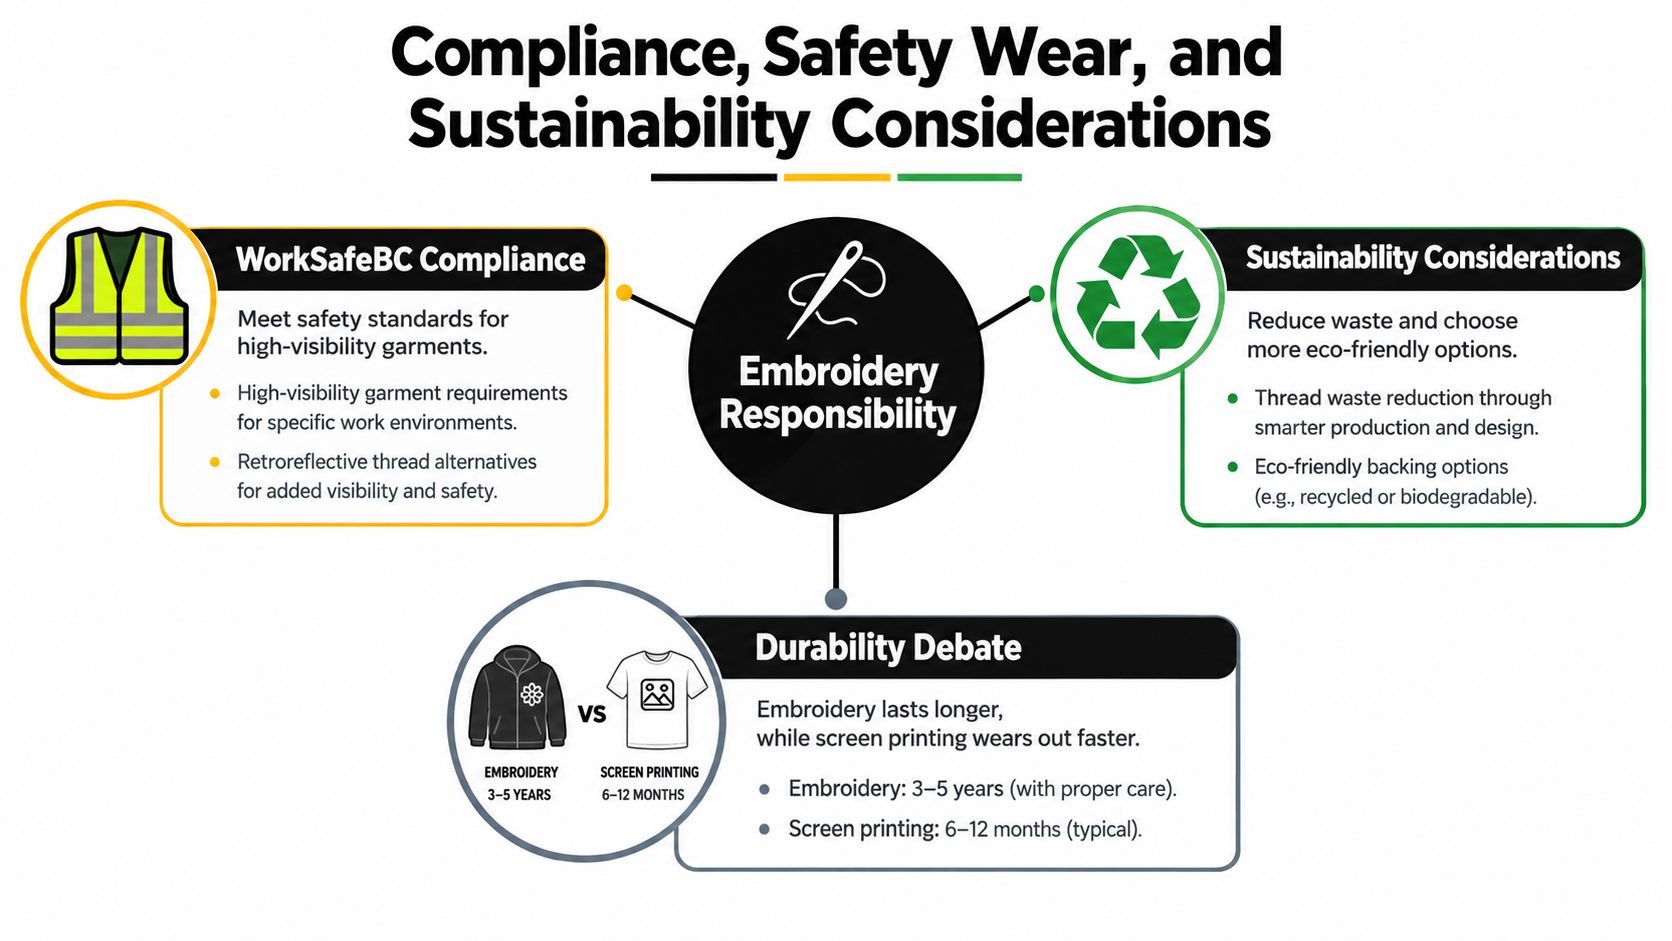
For construction, roadwork, warehouse, and event work, branding must not compromise high-visibility performance. WorkSafeBC identifies minimum requirements for acceptable high-visibility garments. Workers around vehicles or mobile equipment moving slower than 30 km/h need at least Class 1 high-visibility apparel, while exposure to vehicles moving faster than 30 km/h requires Class 2 or Class 3 apparel. The accepted standard for most B.C. worksites is CSA Z96-15. Review the WorkSafeBC high-visibility garment standards before approving a logo position.
Protect safety and product information
Don't stitch over fluorescent panels, retroreflective striping, or other areas needed for conspicuity. Dense embroidery can cover reflective material, add stiffness, or change how the garment sits. Depending on the design and placement, a patch or heat-applied decoration may be more suitable than direct embroidery. The safety programme and garment certification come first, branding second.
Federal textile labelling requirements also matter for garments sold or distributed by a business. Fibre content must be identified by percentage by mass, and dealer information must be provided. Care instructions are voluntary, but if supplied they must be accurate, non-misleading, and available in English or French. The Competition Bureau's textile-labelling requirements also identify CAN/CGSB-86.1-2003 as Canada's national care-labelling standard. Keep the permanent compliance label legible and untouched. Review label placement during the production proof.
Design for the garment's second life
Metro Vancouver's 2023 waste-composition data found that textiles represented 6.5% of regional garbage by weight, and the region describes textiles as one of its fastest-growing waste streams. A separate British Columbia textile-industry report estimates that about 20,000 tonnes of apparel are disposed of annually in the Lower Mainland, representing 2.3% of total garbage disposal. Read Metro Vancouver's discussion of repair, rewear, and textile waste for the regional context.
Those figures make reuse a procurement issue, not a decorative afterthought. Choose neutral garments where possible, use branding that can be covered or replaced for seasonal teams, create a uniform-return process, and ask whether worn items can be repaired or redirected. A durable logo on a garment that no one else can use may extend wear for one employee while shortening the garment's useful life across the organisation.
Document who receives returned uniforms, whether logos can be removed, how mixed-material pieces are handled, and when re-embroidery is preferable to replacement. Compliance and sustainability are cost-control decisions. They reduce failed orders, avoid unusable safety wear, and preserve more value in each garment.
Planning Your Next Embroidery Order With Confidence
Use this sequence before you request production:
- Confirm the blank and placement. Select the garment, colour, size range, and logo location. Flag stretch fabric, outerwear, caps, and high-visibility garments immediately.
- Finalise the artwork. Send a vector file and request a digitised proof. Don't approve only from a screen mockup.
- Set quantity and delivery date. Include a sample approval deadline, not only the date staff need to wear the garments.
- Request an itemised quote. Separate garment cost, digitising, setup, stitching, thread changes, backing, personalisation, delivery, and rush handling.
- Approve the physical sample. Request two samples on the actual garment when placement or fabric behaviour matters. Inspect alignment, coverage, hand feel, backside construction, and garment condition before releasing the full run.
For high-visibility workwear, ask the shop to confirm the garment class, logo position, reflective-area clearance, laundering method, and replacement responsibility. Your safety lead should approve the garment programme, not the embroidery operator alone.
Book a fifteen-minute consultation, send the logo vector, and lock in a production slot two to three weeks before the wear date. That gives you time to correct digitising, change a blank, or revise placement without turning a quality decision into a deadline emergency.
Power Print offers local custom embroidery alongside apparel printing, engraving, workwear, uniforms, and branded merchandise, with mockup support before production. Visit Power Print to discuss your garment, logo placement, safety-wear requirements, and delivery date.